
Introduction
Windows Server 2022 is a powerful server operating system that brings security enhancements, hybrid cloud capabilities, and improved performance. This guide will walk you through the complete installation process for the Desktop Experience version, which includes a graphical user interface (GUI) for ease of use.
Prerequisites
Before you start installing Windows Server 2022, ensure that your system meets the minimum hardware requirements:
- A system with a 64-bit processor (1.4 GHz or faster, x64 architecture).
- At least 2 GB RAM (although 4 GB or more is recommended for optimal performance).
- At least 32 GB of disk space; an SSD is highly recommended for faster performance.
- A bootable USB or DVD containing the Windows Server 2022 ISO file.
- A valid Windows Server 2022 license key to activate your system after installation.
Step 1: Download Windows Server 2022 ISO
The first step is to obtain the Windows Server 2022 ISO file. You can download it directly from Microsoft’s official website or the Volume Licensing Service Center (VLSC) if you have enterprise access. You also can buy the license from Amazon.
After downloading, you need to create a bootable USB drive using tools like Rufus or the Windows Media Creation Tool. Ensure that the USB drive has at least 8 GB of storage space.
Step 2: Boot from Installation Media
To start the installation process, insert the bootable USB or DVD into your server. Restart the system and access the BIOS/UEFI settings by pressing a specific key (usually F2, F12, DEL, or ESC) during startup. In the BIOS menu:
- Navigate to the Boot Order settings.
- Set the USB/DVD drive as the primary boot device.
- Save the changes and exit the BIOS. The system will now boot from the installation media.
Step 3: Begin the Installation Process
Once the system boots from the installation media, you will be presented with the Windows Setup screen. Here’s what you need to do:
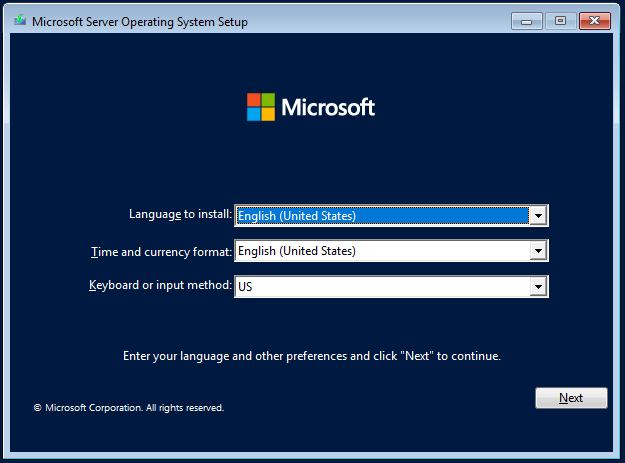
- Select your preferred Language, Time, and Keyboard preferences and click Next.
- Click on Install Now to begin the installation.
- You will be prompted to enter your Windows Server product key. If you do not have one at the moment, you can choose I don’t have a product key and activate Windows later.
Step 4: Choose Edition and Installation Type
Windows Server 2022 offers multiple editions, including Server Core and Desktop Experience. Make sure to select Windows Server 2022 (Desktop Experience) to install the full GUI version. Then, click Next.

You will be asked to accept the license terms. Read through them and select I accept the license terms, then click Next to proceed.
Step 5: Select the Installation Type
At this stage, you need to choose between:
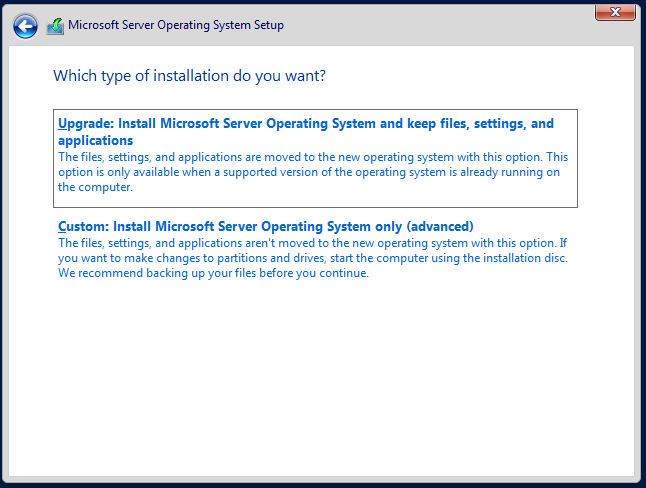
- Upgrade: Retains your current settings, files, and applications (useful if upgrading from a previous version).
- Custom: Performs a clean installation by removing existing data and formatting the drive.
For a fresh installation, choose Custom: Install Windows only (advanced).
Step 6: Partition the Hard Drive
Now, you need to select the disk where you want to install Windows Server 2022. If there are existing partitions:
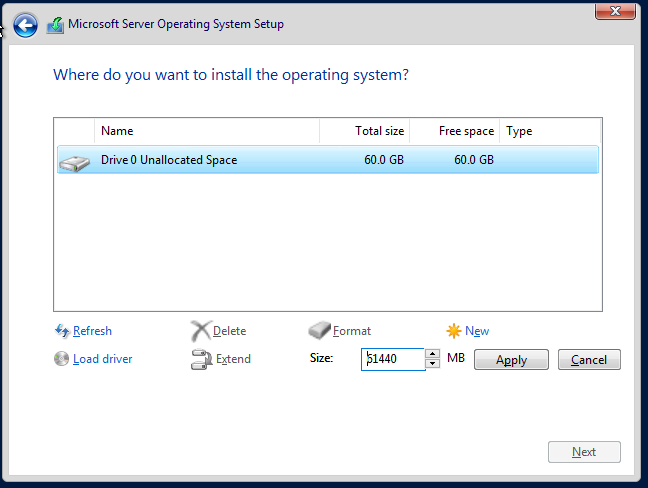
- You can delete them and create a new one for a fresh installation.
- Alternatively, format the selected partition before proceeding.
After selecting your disk, click Next to begin the installation. Windows Server will now copy files and install components. This process may take several minutes, depending on your hardware.
Step 7: Completing the Installation
Once the installation is complete, the system will reboot automatically. You will then be prompted to create a password for the Administrator account. Choose a strong password and click Finish.
After setting up the password, press Ctrl + Alt + Del to log in using the credentials you just created. You will now be greeted with the Windows Server Desktop Environment.
Step 8: Perform Initial Configurations
After logging in for the first time, you need to configure a few essential settings:
1. Configure Network Settings
By default, Windows Server assigns a dynamic IP address. You may want to set a static IP address:
- Open Control Panel > Network and Sharing Center.
- Click Change adapter settings.
- Right-click on your network adapter and choose Properties.
- Select Internet Protocol Version 4 (TCP/IPv4) and configure a static IP.
2. Change Computer Name
Changing the hostname makes it easier to identify your server:
- Right-click on This PC and select Properties.
- Click Change settings under Computer Name.
- Click Change, enter a new name, and restart the system.
3. Enable Remote Desktop
If you want to manage your server remotely:
- Open Settings > System > Remote Desktop.
- Toggle Enable Remote Desktop and apply changes.
4. Install Windows Updates
Keeping your server updated is crucial for security and stability. Go to Settings > Update & Security and check for updates.
Conclusion
You have successfully installed Windows Server 2022 (Desktop Experience) and performed the initial configurations. Your server is now ready for role deployment, such as Active Directory, DNS, DHCP, or File Services.
For further customization, you can install additional features via Server Manager or PowerShell. If you encounter any issues, refer to Microsoft’s official documentation or community support forums.
Enjoy your new Windows Server 2022 installation!